
Create an AR activation
AliveIt is an augmented reality (AR) platform that lets you add a video or a 3D model to any printed image. Your customer scans the QR code, points their phone camera at the picture, and your content appears right on top of it ✨ It's an easy way to turn photos, cards, prints, and gifts into interactive AR products.
Here's how to create an AR activation, step by step.
Before you start:
- Video: MP4, AVI, or MOV, up to 1920×1080 px and 1 GB
- Up to 100 image and video pairs in one activation
- Up to 1.5 GB per upload. Got big files? Upload them in parts.
1. Start a new activation
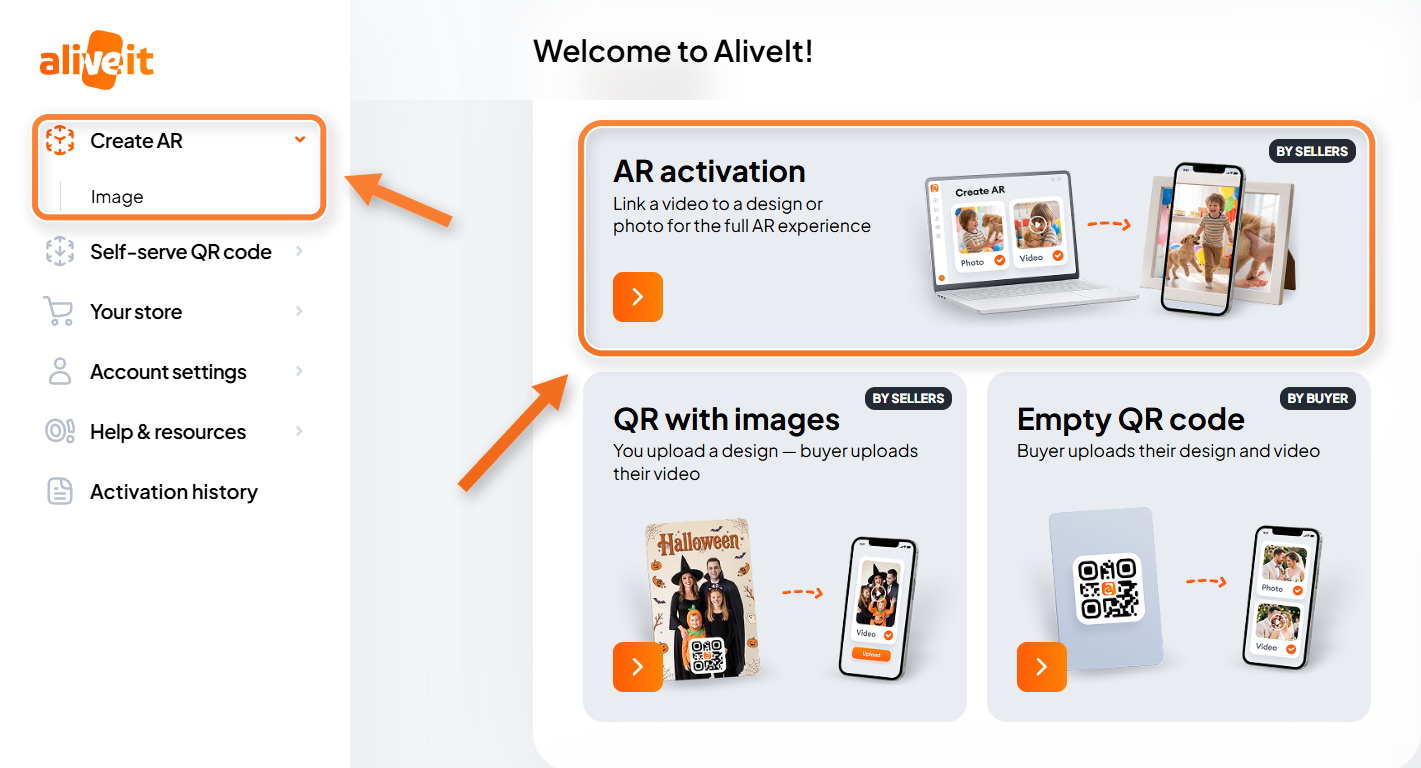
In the sidebar, go to Create AR → Image. Give your activation a name, or keep the default one with today's date and time.
2. Add your image and video
- Click Upload photo and choose your image. This is the picture your customers will point their camera at.
- In the same row, click Upload video and choose a video or a 3D model. No video yet? Click the sparkle icon to generate one with AI.
- Rename it in Photo name if you like. It's an internal name to help you find it later.
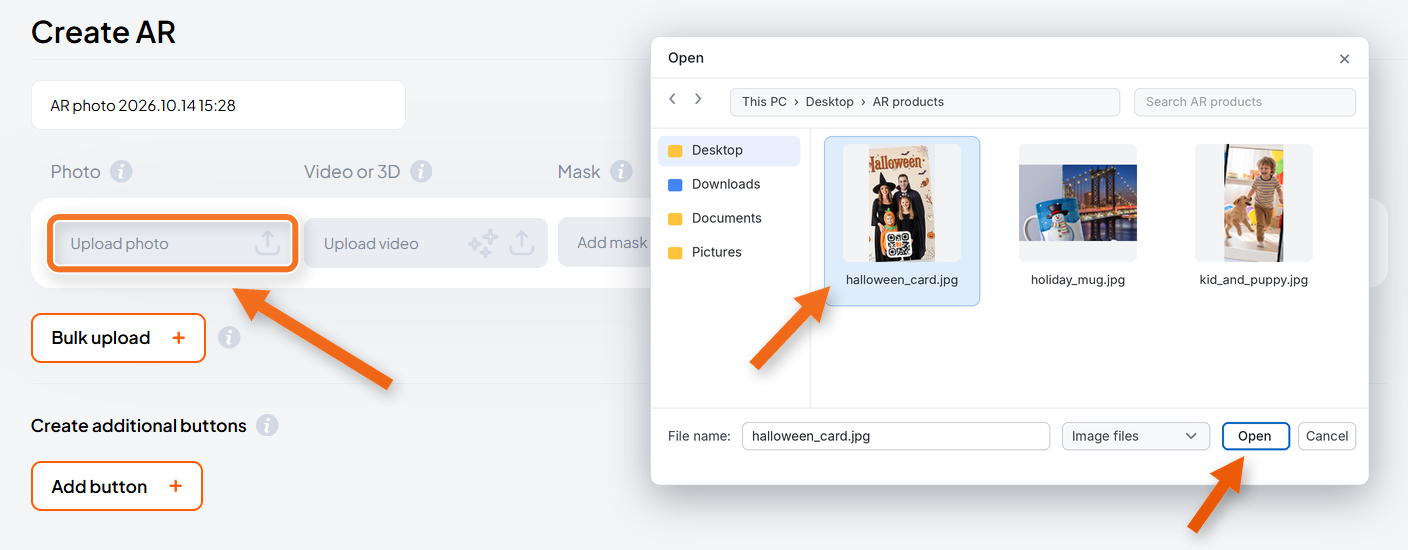
Adding lots of files? Click Bulk upload under the row.
See Upload AR in bulk to learn how to name and prepare your files.

Need to adjust the video? Click the pencil icon to open the editor. Trim, rotate, crop, or use a frame from the video as your image. See Edit videos with the built-in editor for details.

Video cut off at the edges? That happens when the image and video have different orientations, for example a horizontal photo with a vertical video. Click the crop icon to fit the whole video inside the image.

3. Add extras (optional)
A photo and a video are all you need. These optional extras make your AR easier to use, more memorable, and better at promoting your business.
Place the QR code on your image
Print the QR code right on your design, so customers have everything on one product.
- After you upload the photo, click the QR icon in the photo cell.
- Drag the QR code to where you want it and set its size.
- Save your changes.
The QR code will be part of your print files. Planning to print the QR code separately? Skip this step.


Add a mask
A mask gives your video a shape, like a heart, a circle, or a photo frame. Click Add mask, then pick a shape from the gallery or upload your own.

See Add a mask to your AR image.
Add an effect
An effect is an animated overlay that plays on top of your image, like snow, sparkles, or confetti.
- Click Add effect in the same row.
- Pick an effect from the gallery. Some are free, others cost 15 credits (the price is shown on the effect). Or upload your own: a MOV video with transparency, up to 1 GB.
- Adjust the effect's position and size over your image.
- Save your changes.

Add buttons
Add buttons with links to your website, store, or social media. Customers see them while they watch your AR.
- Click Add button under Create additional buttons.
- Enter the Button link. Use the full link, starting with https://.
- Pick a Button position: Up, Down, Left, Right, or Center.
- Choose how the button looks:
- Standard button: type the Button text. It shows on the button.
- Your own button: click Upload button image and add a PNG. The text field changes to Button size, so drag it to make your button bigger or smaller.
- You can add up to 50 buttons, up to 10 in each position.

4. Create
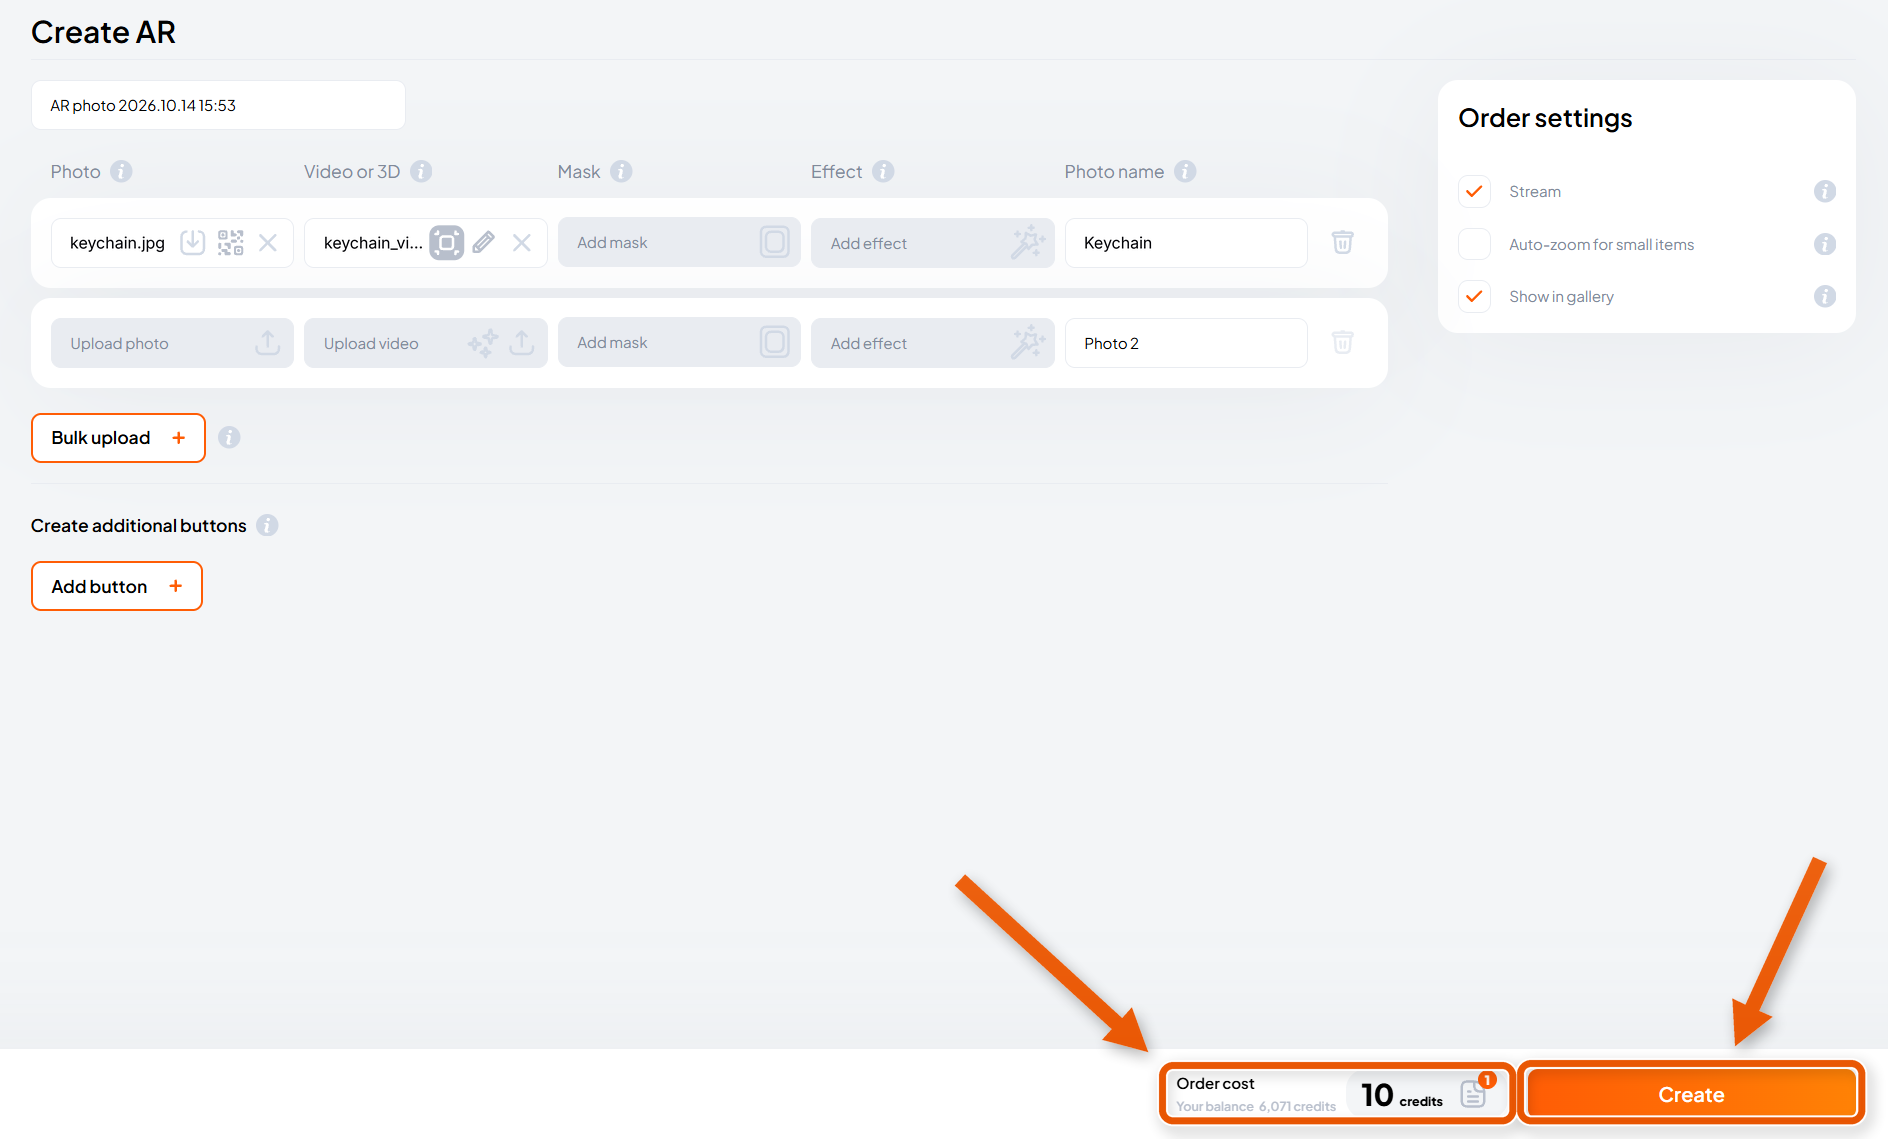
Check the Order cost at the bottom of the page to see how many credits this activation will use. Then click Create. Depending on file size and your connection, this takes a few seconds to a few minutes.
When the button changes to Update and new buttons appear at the top, your AR activation is ready 🎉
5. Download and test
- Download QR code: get the code as PNG or SVG.
- Download print files: get a ZIP with the QR code (PNG and SVG) and your image with the code on it, if you placed one.
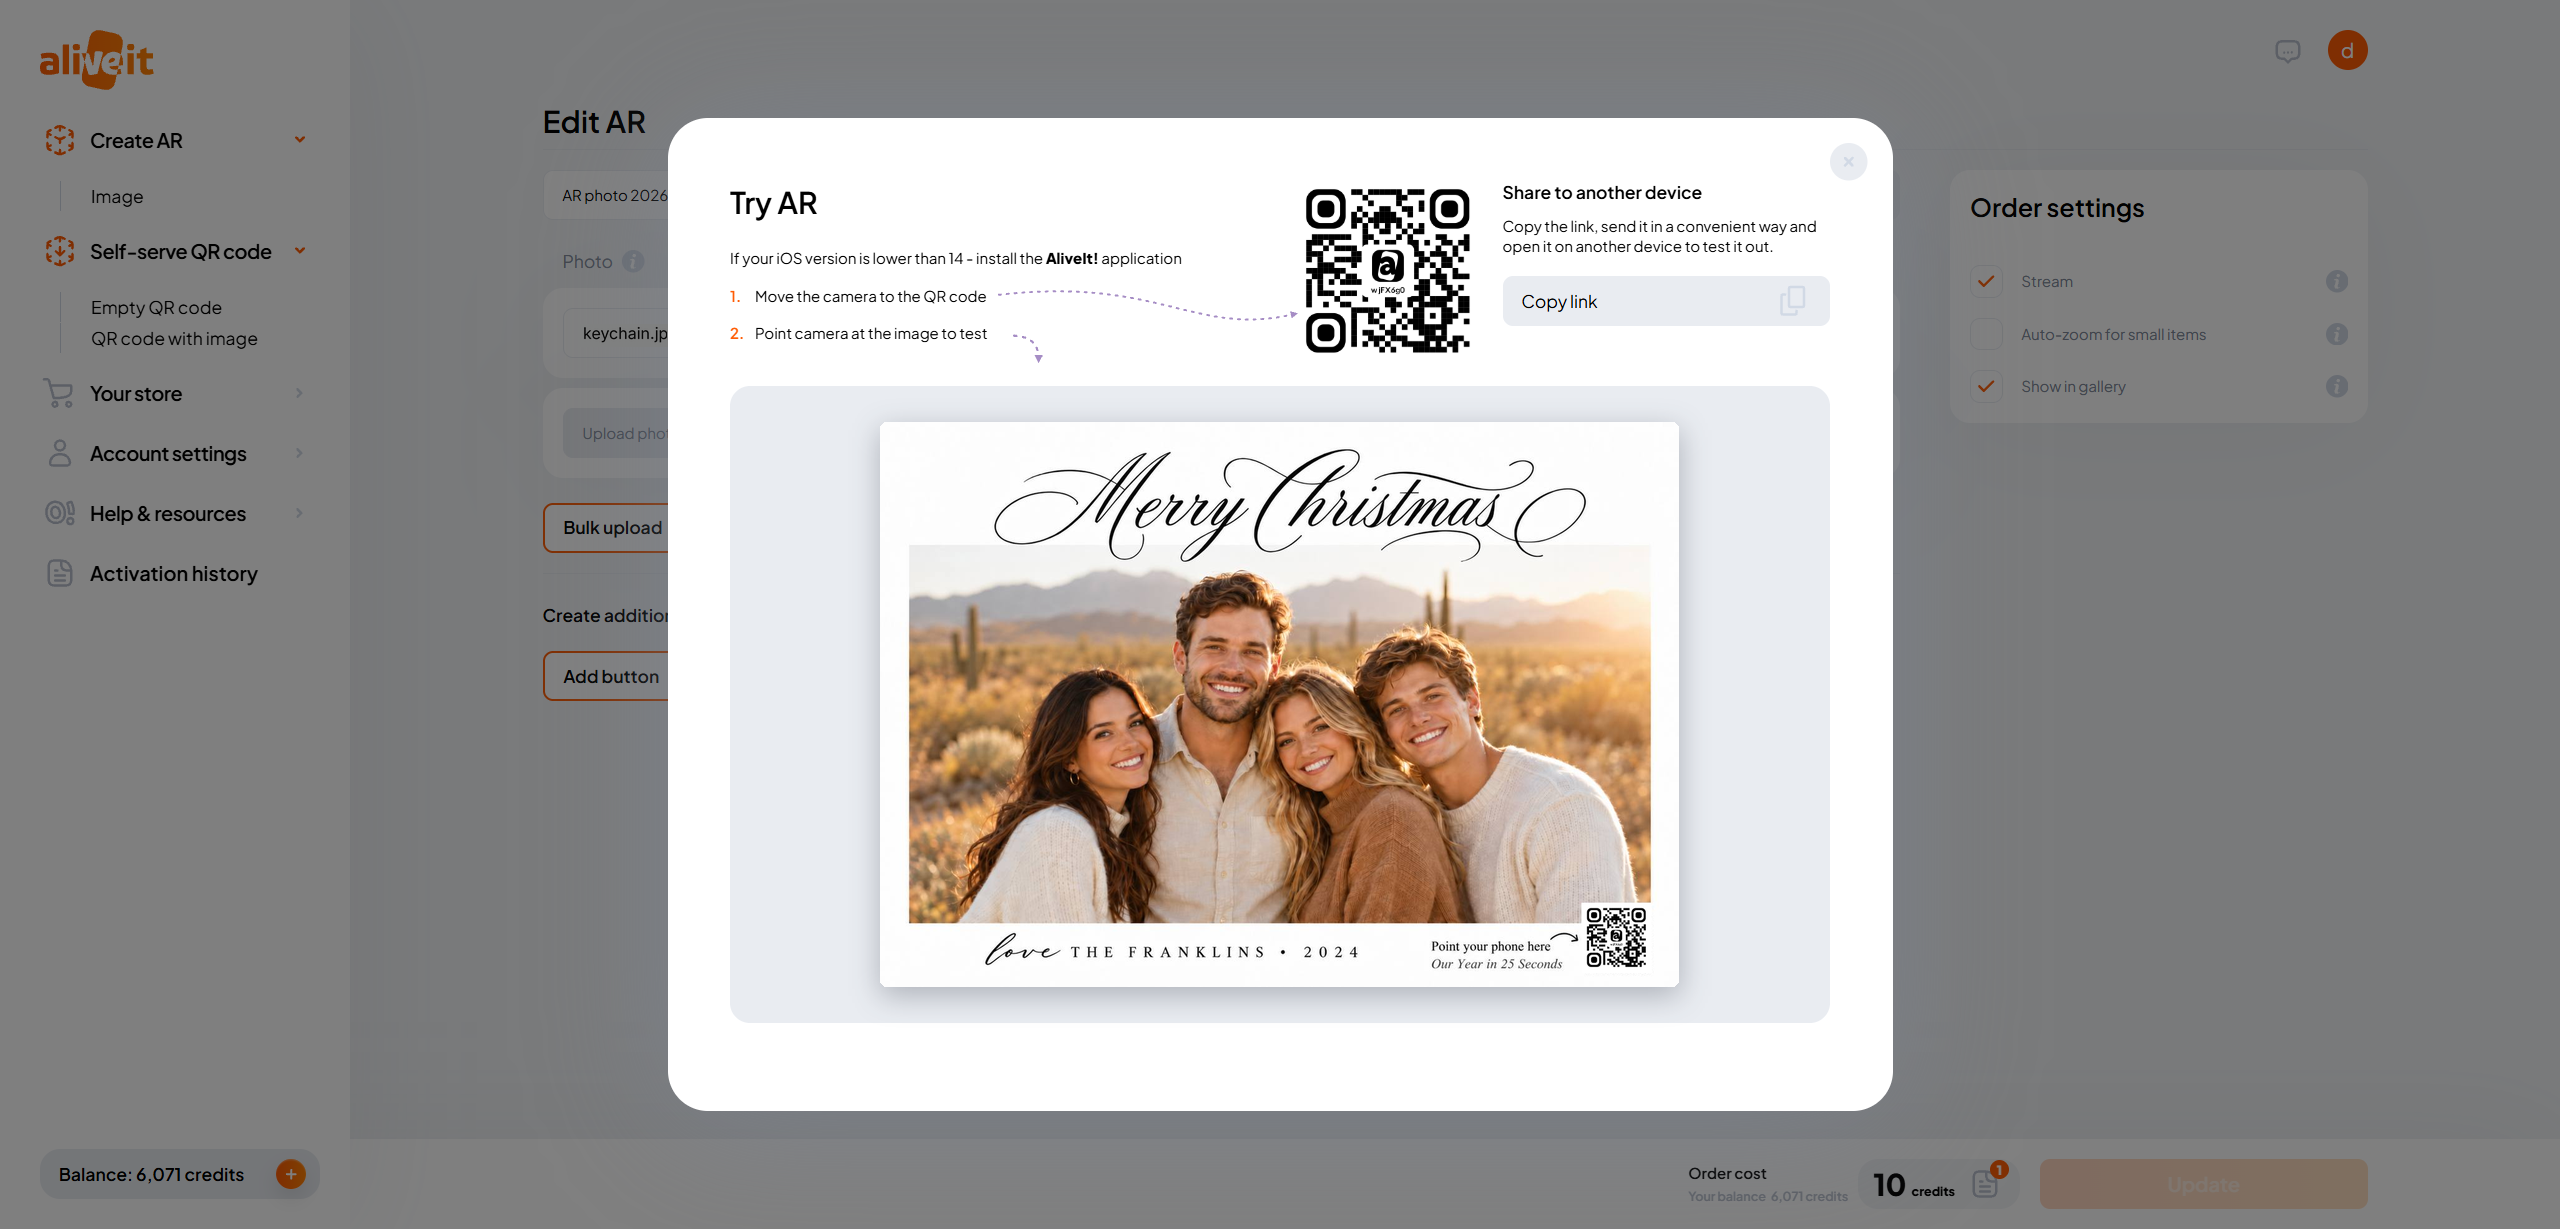
- Try it: opens the QR code and image on your screen. Scan the code with your phone, then point the camera at the image to see the result.

Tip: test your activations in the AliveIt app. It's the easiest way to check your changes after editing.
Share it with your customers
If you didn't place the QR code on the image, print it separately or send your customers the link shown next to the QR code.
That's it. Your AR activation is live ✨