
Create QR codes with an image
Sell one design, let every customer add their own video ✨ With a self-serve QR code, you upload the image once and create as many unique QR codes as you need. Each customer scans their code, adds a personal video, and it plays right on top of your design.
Perfect for greeting cards, keychains, t-shirts, and other products you sell in volume.
Good to know: Android customers need the free AliveIt app to upload their video. Uploading isn't available in the browser on Android.
1. Start a new activation
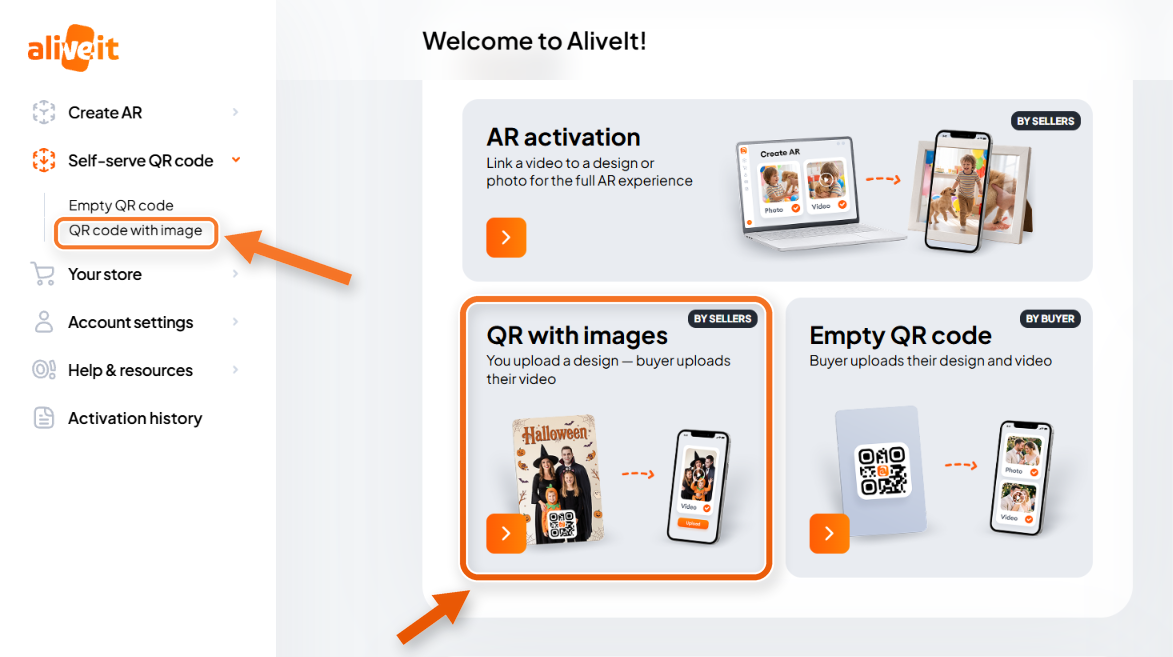
In the sidebar, go to Self-serve QR code → QR code with image. Give it a name that's easy to find later, or keep the default one.
2. Set the number of QR codes
In Number of QR codes, enter how many unique codes you need, up to 1,000.
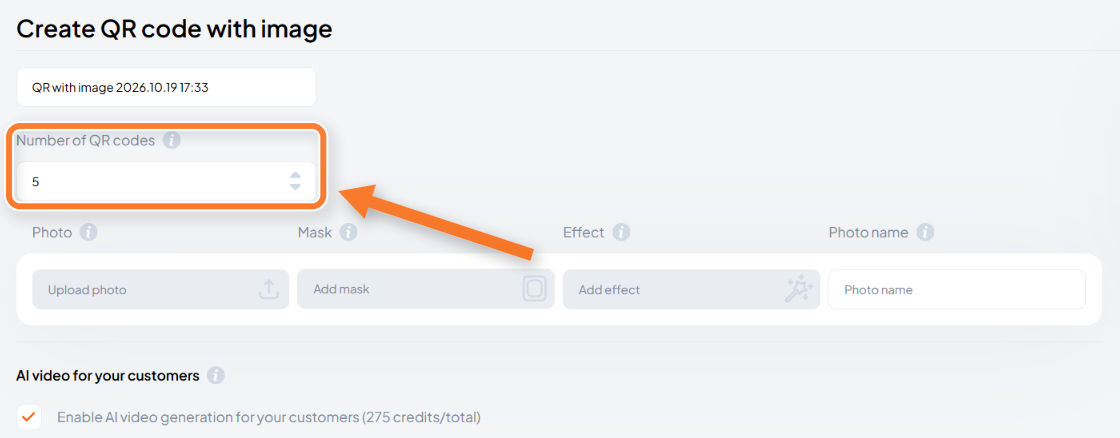
⚠️Count carefully: you can't change the number of QR codes after you create them, and the credits are charged right away.
3. Add your image
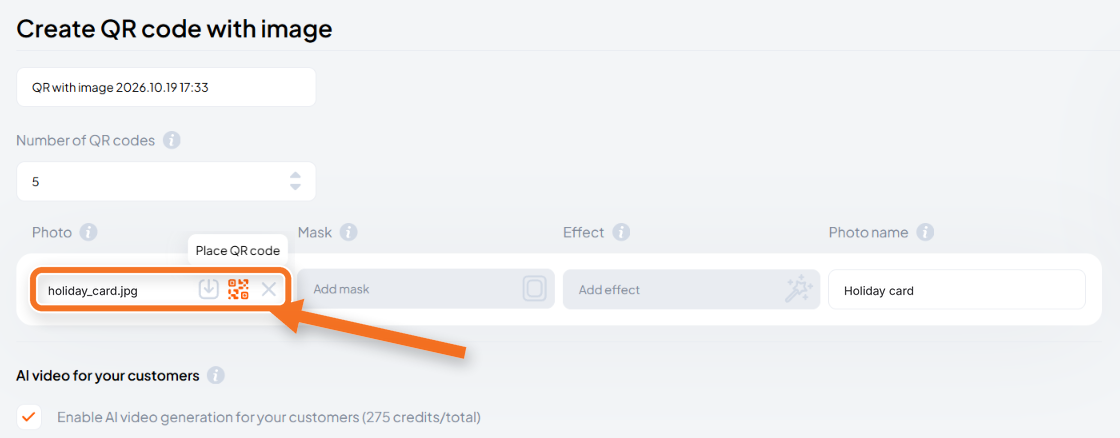
- Click Upload photo and choose the image you'll use on your product.
- Add a Photo name if you like. It's an internal name to help you find this later.
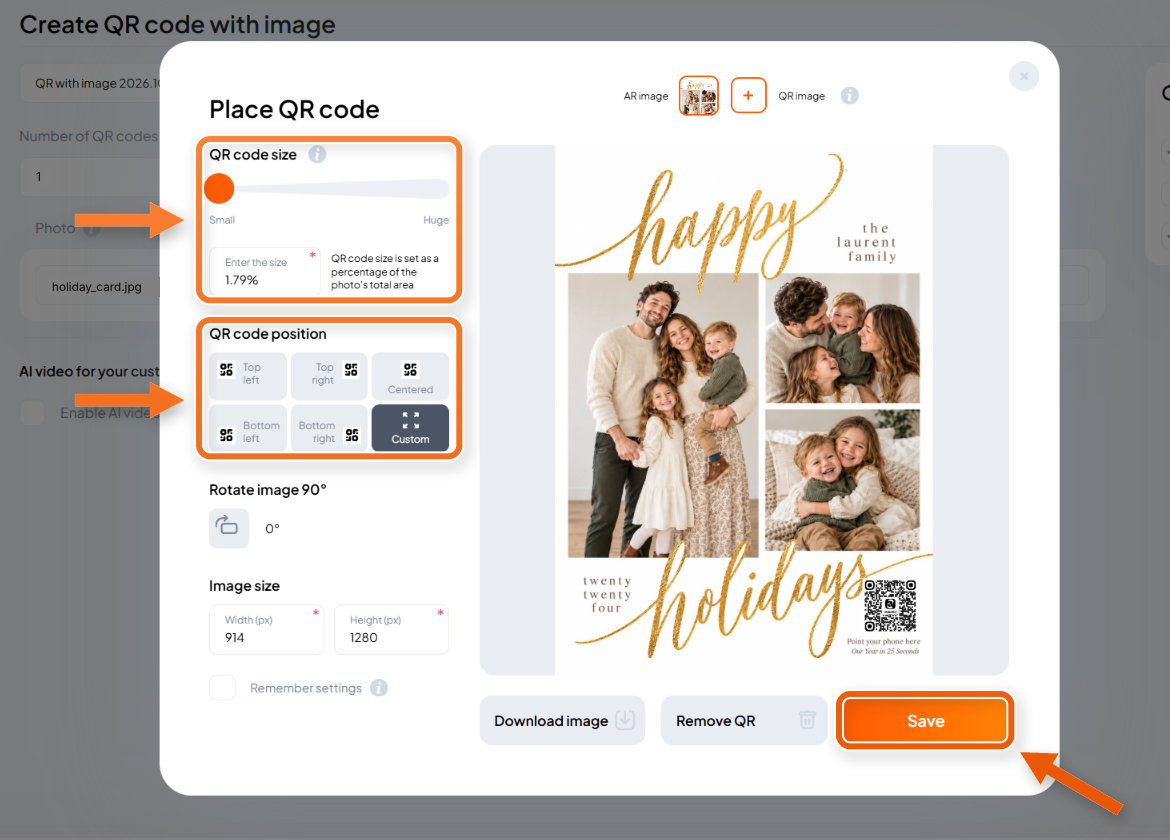
Want the QR code on the design? Click the QR icon in the cell to set its size and position. See Place the QR code on your image for step-by-step details. Planning to place the codes separately? Skip this step and download them later.
4. Add extras (optional)
Make your AR even more eye-catching:
- Add mask: give the video a shape. Pick one from the mask gallery or upload your own. See Add a mask to your AR image.
- Add effect: add an animated overlay, like snow or fireworks. Uploading your own effect is free. See Add an effect.
6. Let customers create videos with AI (optional)
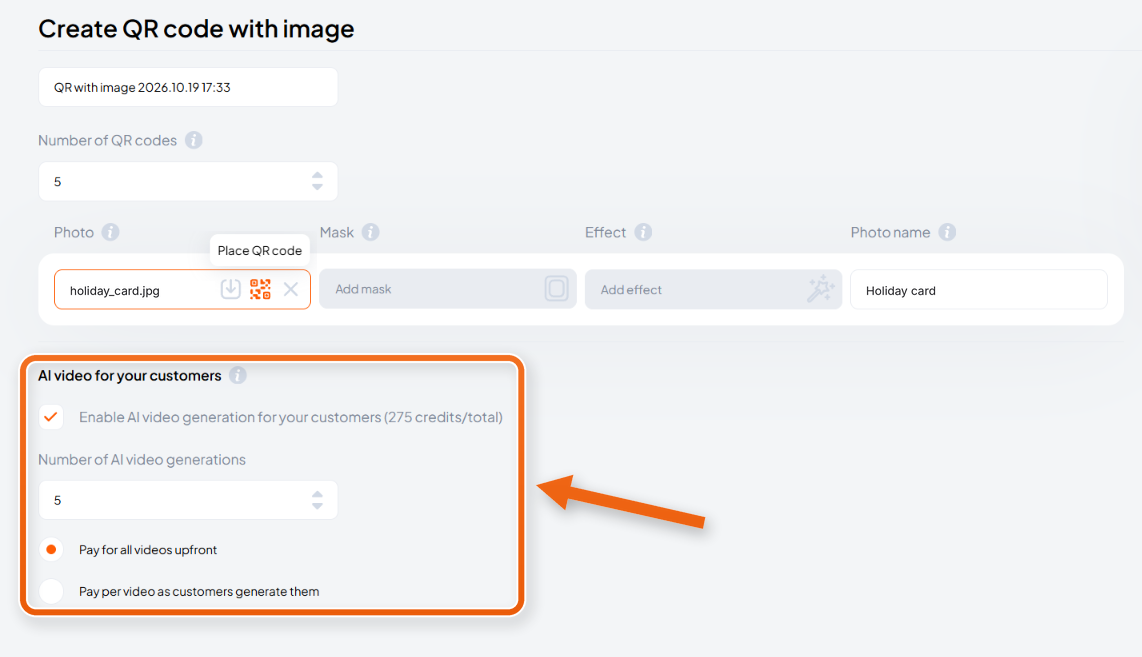
Check Enable AI video generation for your customers to let customers create a video with AI instead of uploading their own. Each video costs 55 credits. Set the Number of AI video generations, then choose how to pay:
- Pay for all videos upfront: credits are charged when you create the QR codes.
- Pay per video as customers generate them: credits are charged from your balance each time a customer creates a video.
5. Create and download
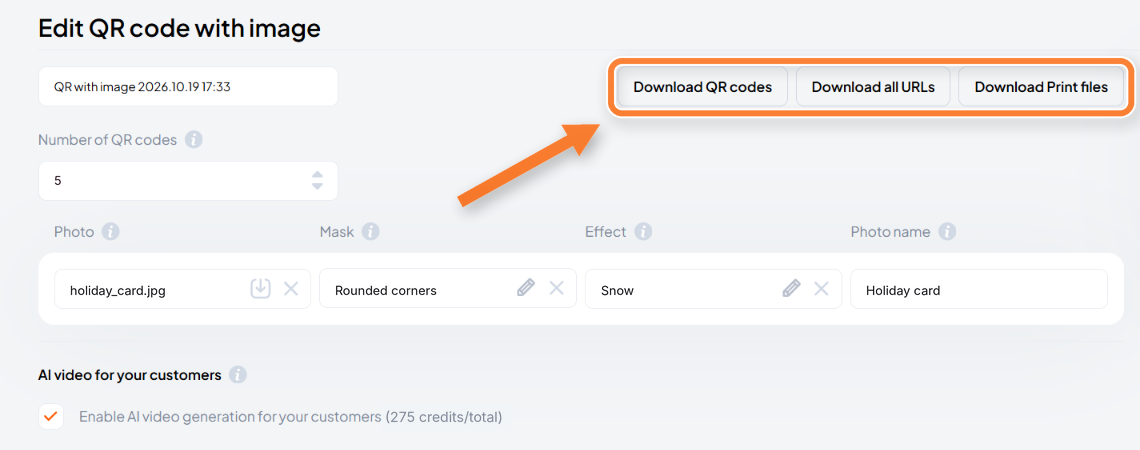
Click Create. When it's done, three buttons appear:
- Download QR codes: a ZIP with all your QR codes.
- Download all URLs: an Excel file with the link for each QR code.
- Download print files: a ZIP with your image and QR codes, ready to send to print.
6. Test before you print
- Click Download print files and unzip the archive.
- Open the AliveIt app and scan the first QR code in the list.
- Point your camera at the image and tap Add your video.
- Choose a video, adjust it with Fit to image, Rotate left, Rotate right, or Replace video, and tap Finish and upload.
Your customers will go through the same steps. See How to add your own video for the full walkthrough.
Tip: print one sample first and make sure the code scans well on the real product before you print the whole batch.
Can I edit it later?
After you create it, you can only change the image. The number of QR codes, the mask, and the effect stay the same.
Heads up: changing the image updates it for every QR code in this activation, including ones your customers already have.